
Payment requests are sent to patients to collect payment for services provided. In this article we walk through how to import and update payment requests in the Graphium dashboard.
Before Getting Started with Payment Requests
Before you get started importing payment requests in the Graphium dashboard, please make sure you have read through the following help documents (in this order) to make sure you are setup correctly to accept payments.
Table of Contents
- Importing Payment Requests
- Resend Payment Requests
- Adding a Phone or Email to a Payment Request
- Removing a Phone or Email from a Payment Request
- Manually Collecting Payment
- Canceling a Payment Request
Importing Payment Requests
NOTE: If at any time throughout the import process you cancel your import, all of the current import data will be lost. You must fully complete the import process for the data to be saved.
- Navigate to the Payment Requests page in the Graphium dashboard.

- Click the Import Payment Requests button.

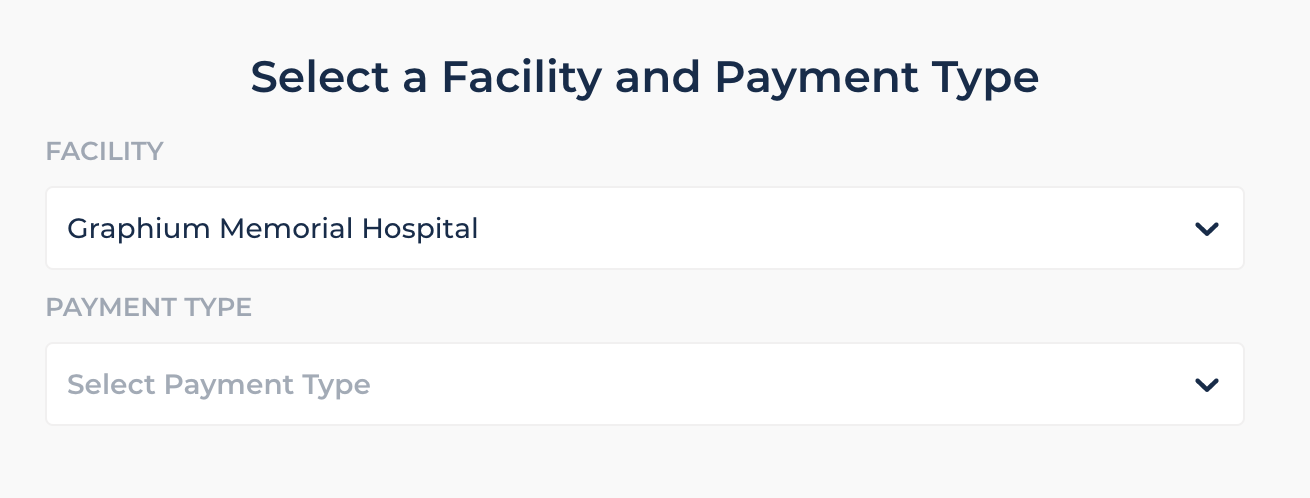
- Select the Facility you want to import payment requests for, and the Payment Type you wish to use.
- Click the Next button.
- In the popup window, you are given the option to either import a CSV/TSV/TXT file or manually enter in the data required.
- If you are importing a file, follow these steps:
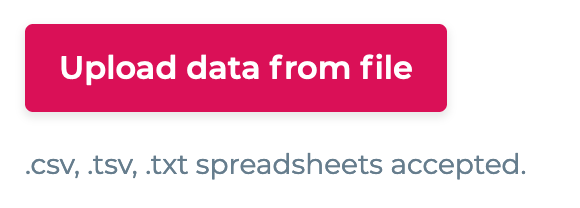
- Click the “Upload data from file” button.
- In the file window, find the file on your computer and select it.
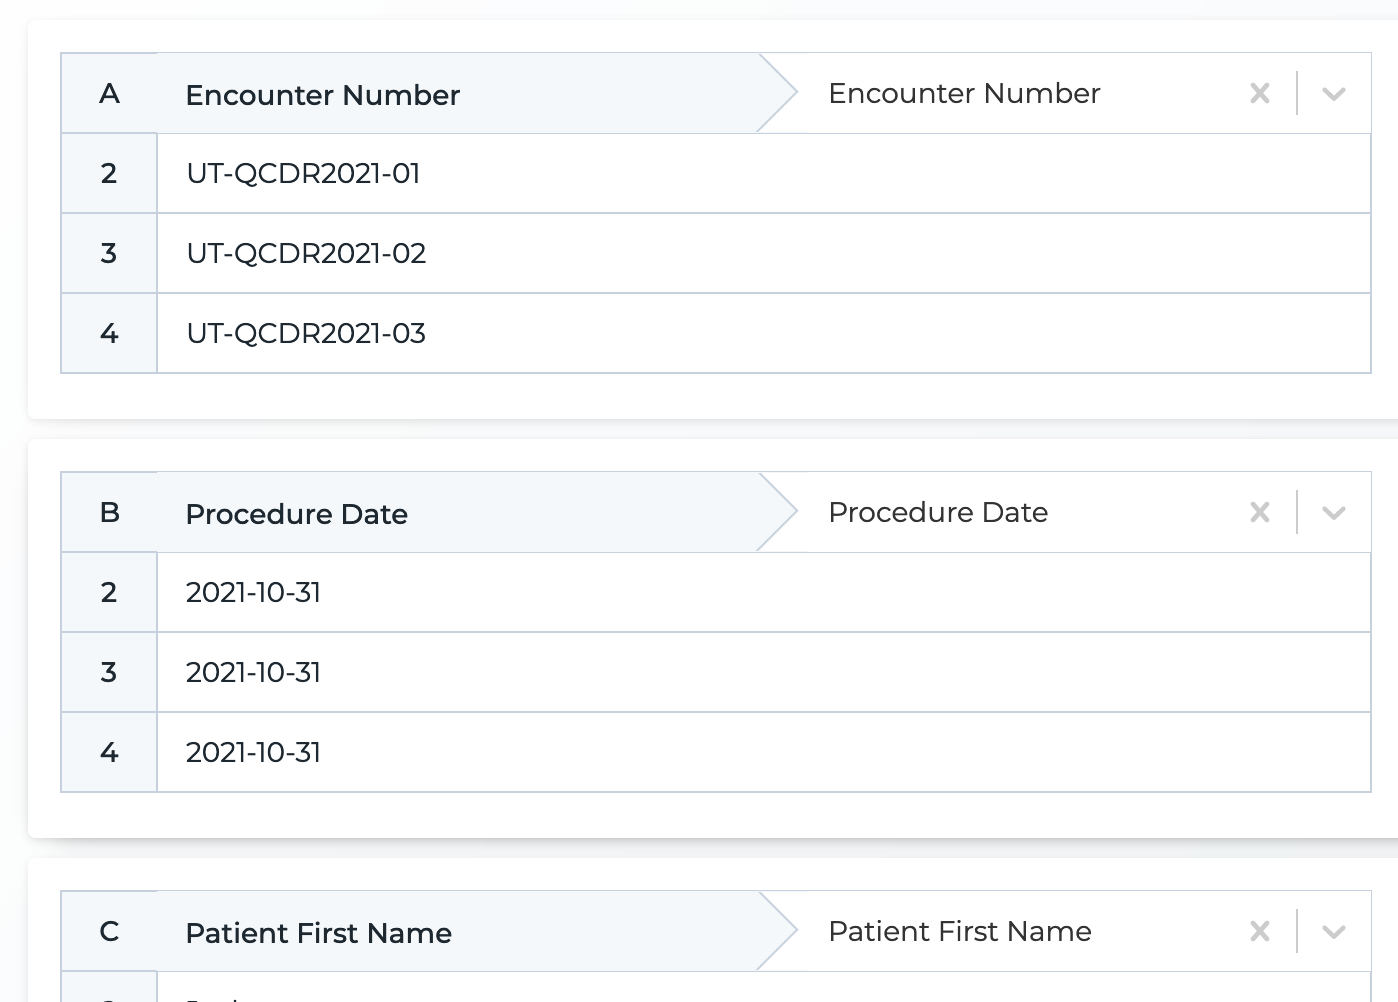
- On the next page, make sure all the correct columns in your CSV/TSV/TXT file are mapped to the correct values. If not, use the drop down for each to correct the mapping.
- Scroll to the bottom and click Review if everything matches as expected.
- Click the “Upload data from file” button.
- If you are manually entering data, follow these steps:
- In the Import Payment Requests popup window, double click the column you wish to edit in the “or just manually enter your data here” section.

- Enter values for each payment request you wish to import.
- In the Import Payment Requests popup window, double click the column you wish to edit in the “or just manually enter your data here” section.
- If you are importing a file, follow these steps:
- If there are any values outlined in red, mouse over the red cell to see the error.
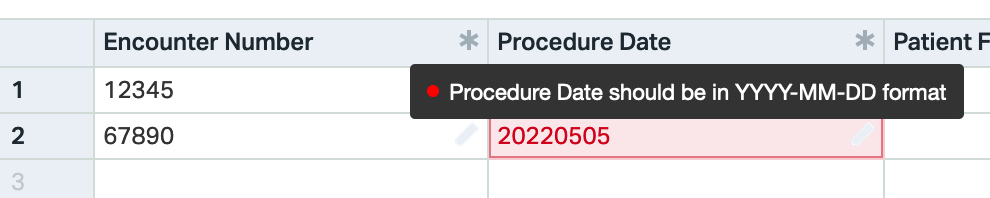
Correct the error by manually editing (double click to edit) the value. Possible errors below:- Duplicate Encounter Number: Each encounter number must be unique.
- No Procedure Date: Each request must include a procedure date.
- Invalid Procedure Date Format: Procedure date must be in a YYYY-MM-DD format.
- If all values are correct (or you wish to proceed WITHOUT the invalid values), click the Continue button and then click Yes to submit.
- The next page contains two sections. Ready to Send and Unable to Send requests.
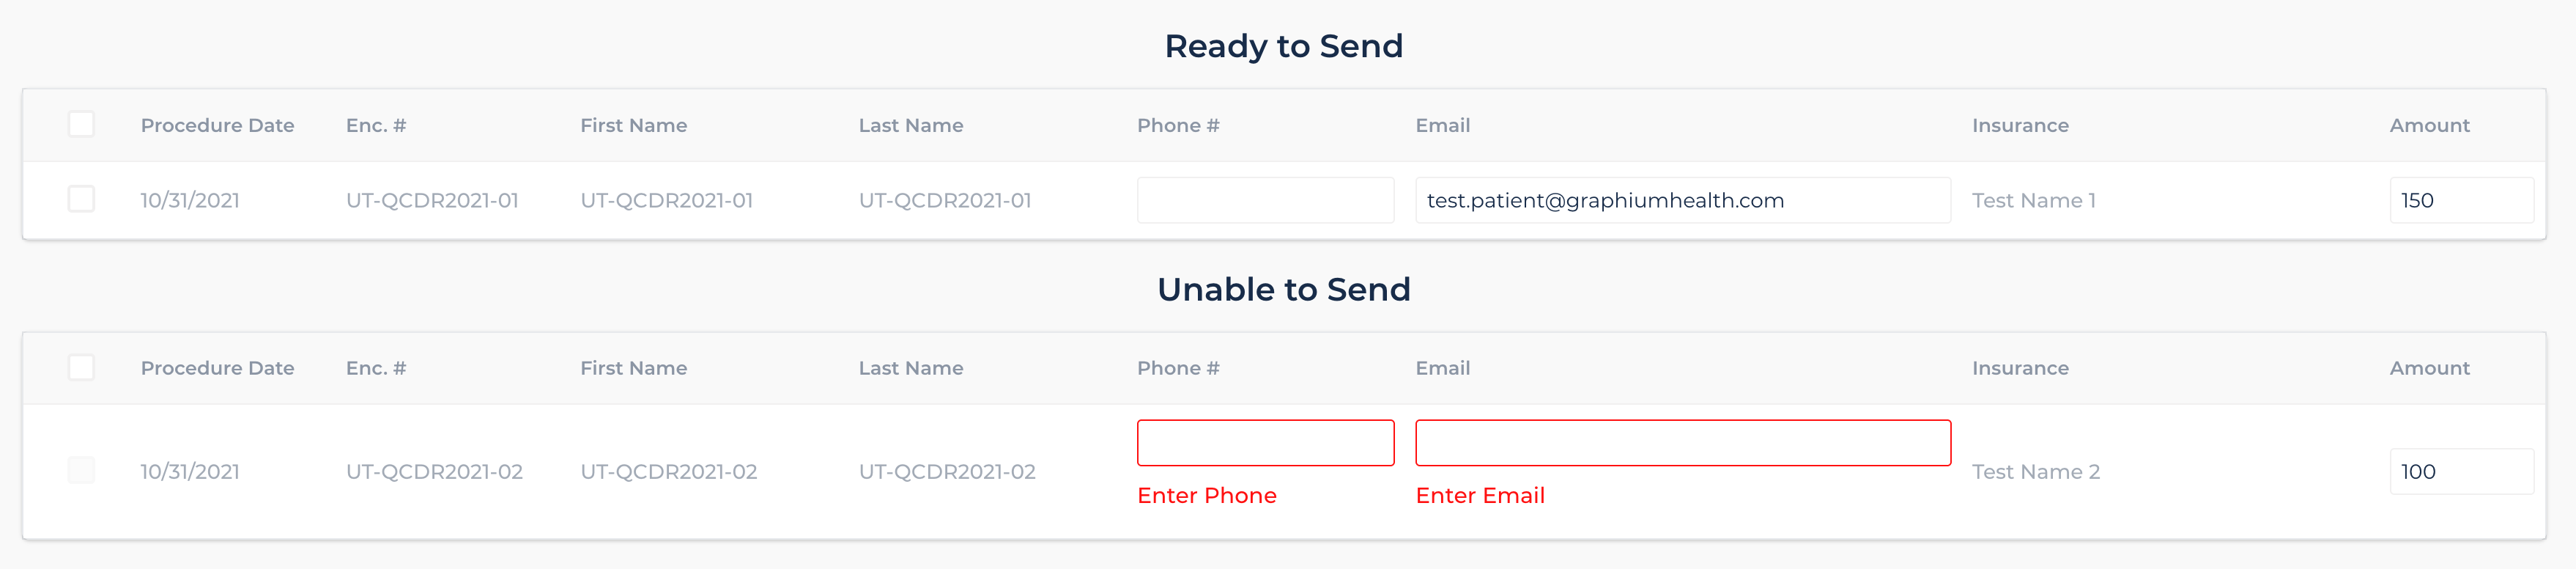
- Once all fields are updated, select the checkbox next to all requests you wish to import.
- Click the “Submit” button to import your payment requests.
NOTE: Your payment requests are queued for import after submitting, so they will not be instantly available to view. Typically requests are imported within 1-2 minutes, so a simple refresh will show your imports. If not, you can click the link in the yellow info bar after importing to view the status of your import.

Resend Payment Requests
- Navigate to the Payment Requests page in the Graphium dashboard.
- Click the Actions button next to the payment request you want to resend.
- Click the Resend Request action.
- Select the contact methods you want to resend to.
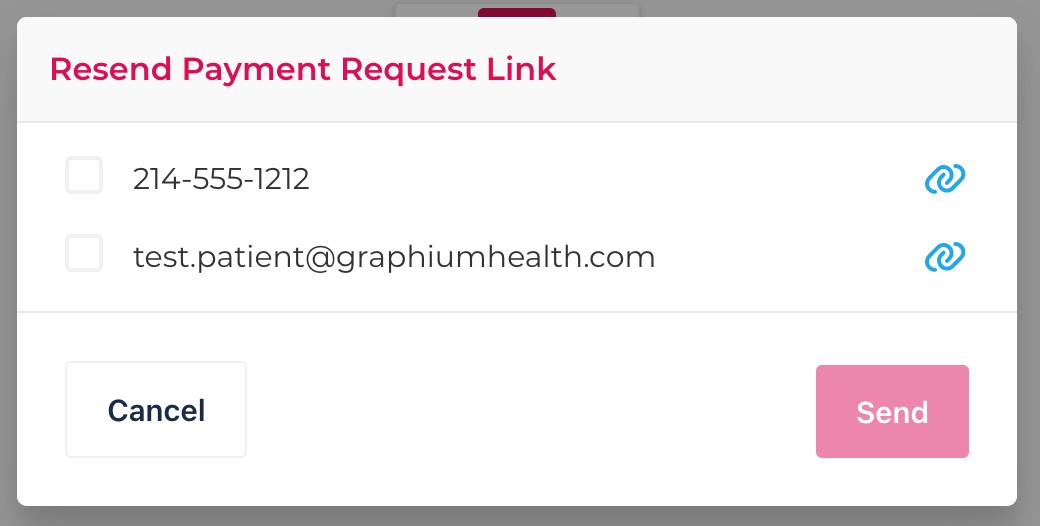
- Click the Send button.


Alternatively, if you just want to copy the payment request link, click the link icon next to the contact method you want to copy and the link will be copied to your clipboard.
Adding a Phone or Email to a Payment Request
- Navigate to the Payment Requests page in the Graphium dashboard.
- For the payment request you want to update, click the View Details button.
- Click the + button next to the contact method you want to add.
- Fill out the form and click the Add button.


Removing a Phone or Email from a Payment Request
- Navigate to the Payment Requests page in the Graphium dashboard.
- For the payment request you want to update, click the View Details button.
- Click the X button next to the contact method you want to remove.
- Confirm the removal by clicking the Deactivate button in the modal window.

Manually Collecting Payment
- Navigate to the Payment Requests page in the Graphium dashboard.
- For the payment request you want to update, click the View Details button.
- In the menu at the top of the payment request, click the Collect Payment button.
- Enter the amount you collected. If you want to mark this payment as complete after the payment, check the “Mark as complete?” checkbox.
- Add a payment date and any notes about the payment.
- Click Send.


Canceling a Payment Request
- Navigate to the Payment Requests page in the Graphium dashboard.
- For the payment request you want to update, click the View Details button.
- In the menu at the top of the payment request, click the Collect Payment button.
- Click the Cancel Payment Request button.
- Add a cancellation reason, then click the Yes button to confirm cancellation.
