Below are instructions explaining how to create and/or update a list of encounters for your organization or facility along with corresponding patient demographics.
Objective
-
Create and/or update a list of encounters for your organization or facility along with corresponding patient demographics.
Directions
Format Encounter File(s)
-
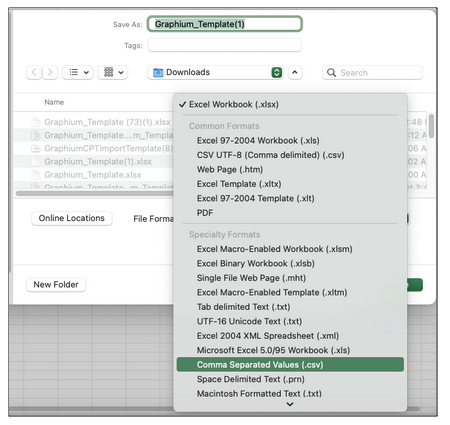
If your organization would like to utilize Excel, we highly encourage you to click here and download our import template. However, please note: Excel file types (.xlsx) are not supported within Graphium's import tool. Therefore, once you have created your Excel file, you will need to save it as one of the acceptable file types (.csv, .tsv, or .txt) before performing your import.
-
Here are some key points to consider when formatting your "Encounter Import" file:
-
Each “Encounter Import” file must only contain data for a single facility.
-
Each encounter must only appear once in the “Encounter Import” file and must include the associated patient's first and last name, admission date and admission time.
- CAUTION: If an existing encounter number is already in use but is then included within your "Encounter Import" file, any corresponding patient demographic information will be updated.
-
-
- Please ensure the header row (containing the column names) is not repeated throughout the file.
-
-
Data within the “Encounter Import" file must be formatted correctly:
-
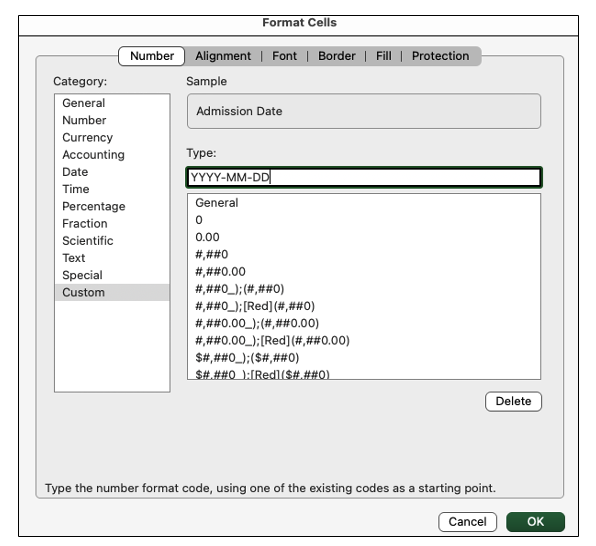
Admission Date must be formatted as YYYY-MM-DD. In Excel, this can be formatted using a custom format of “YYYY-MM-DD".
-
-
-
-
Admission Time must be formatted as HH:MM:SS. In Excel, this can be formatted using a custom format of “HH:MM:SS". Once selected, please ensure times do not include AM/PM and there are no extra spaces before or after times.
-

-
-
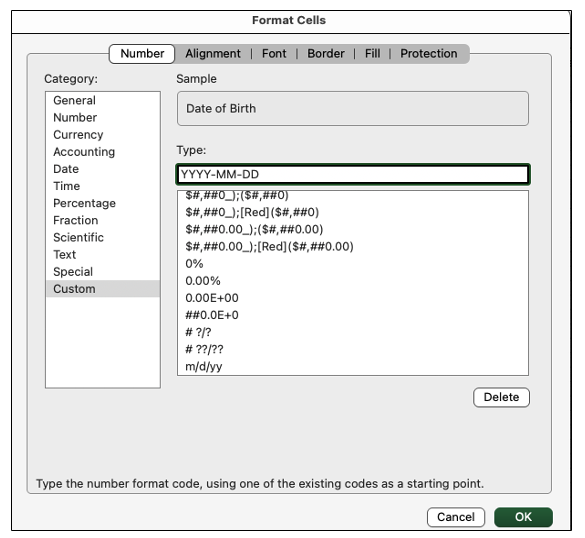
Date of Birth must be formatted as YYYY-MM-DD. In Excel, this can be formatted using a custom format of “YYYY-MM-DD".
-
Import Encounter File(s) to Graphium
-
Once you have properly formatted your Encounter file and saved it as one of the acceptable file types, click here to log into the Graphium EMR Dashboard™. If you do not have access to the dashboard, please contact your organization's Administrator.
-
Click on the settings icon in the upper right corner and then choose "Import".
-
Click on "+ New Import".
-
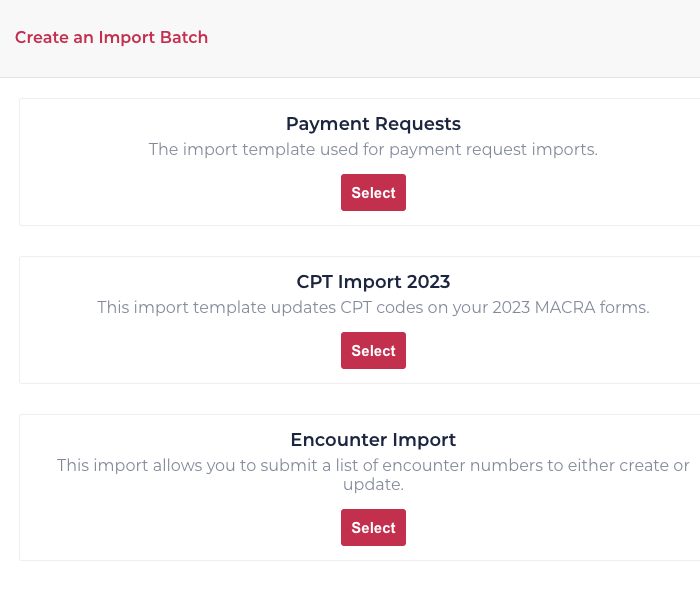
Click the "Select" button under Encounter Import.
-
Choose your applicable facility from the “Select Facility” drop down menu and then click "Create". Note: the title for your import will default to the filename you select, but you can enter a different title in the "TITLE" box provided.

-
Click on "Upload data from file" and use the file explorer to locate your file for upload. If you prefer not to upload your data, you will need to manually enter the encounter and patient demographic information on this page. Note: Encounter number, Patient First and Last Name, Admission Date and Admission Time are all REQUIRED fields of data in order to successfully process your import.

- The column titles within your file may not match our system’s default categories. Therefore, you must “map” or match your unique column titles to Graphium's defaults. Your unique column titles will appear on the left side under INCOMING FIELDS. Choose the matching Graphium category from the drop down menu on the right side under DESTINATION FIELDS and then click "Continue". Note: if a column contains no data, simply leave the associated DESTINATION FIELD blank.

- Once you've submitted your upload, you will automatically be redirected back to the Import Batch home page, where you should see your encounter import at the top of the list. You will also see the number of encounters uploaded under the Status column. Note: if the number is highlighted in yellow, simply refresh the page, as the system is still in the process of finalizing your request.

- Once the number is highlighted in green, the encounter(s) have been successfully added to your form.

- Should there be numbers highlighted in red, it means there was a problem with the data you entered, and the error needs to be corrected.

- To correct errors, click the red View Details button under the Actions column. A list of the encounter(s) you uploaded will appear. If you click the notebook icon under the Status column, a description of the error will appear.

- Once you have identified the error, click the red Edit Record button under the Actions column and make the necessary corrections to the affected data field. Click the red Save button in the right corner.
- You will then need to reprocess that encounter, by clicking the red "Reprocess" button under the Actions column.
- Navigate back to the Import Batch homepage. If you updated the encounter correctly, the red highlighted number will now be green.

