This article shows two different ways to access and print completed forms.
How to access and print a completed form from the Graphium EMR Dashboard
Below are instructions on how to access and print a completed form from the Graphium EMR Dashboard:
1. Login at https://app.graphiumemr.com
2. Go to Patients -> Form Search
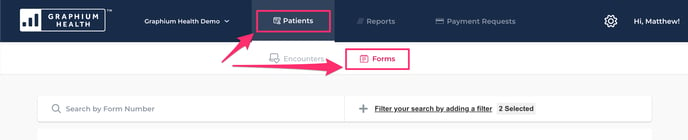
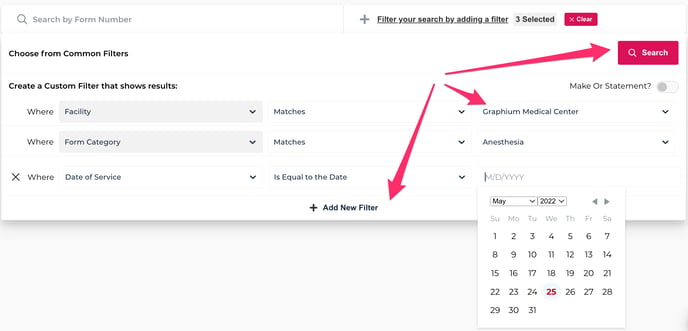
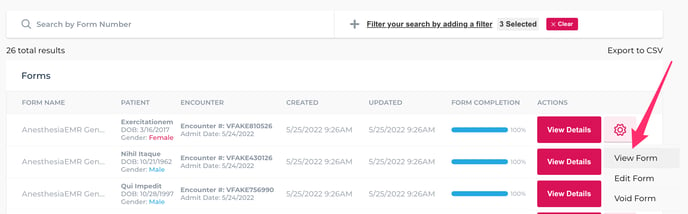
3. Click the "Filter your search" link, add the necessary parameters, and then click Search. Note that you must specify a Facility.
4. The list of matching forms will be displayed below. To view a form, click the gear icon, then click View Form.
5. The form will load with a print icon as shown below. Click on the icon, chose the correct printer and print.

How to access and print a completed form from the Graphium App on an iPad
Below are instructions on how to access and print a completed form form the Graphium App on an iPad:
1. Begin by logging into the Graphium app. Ensure you are in the appropriate organization and facility for the patient for you wish to access.
2. Search for the patient form you wish to save/print via either the "Recent Forms" tab or the "Encounters" tab. Note: you will only be able to save/print completed forms (highlighted in green). The save/print form function does not work for incomplete forms (highlighted in red).
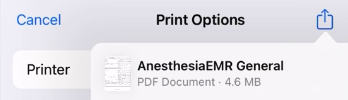
3. Select the appropriate patient form and then click on the printer icon in the top right corner of the app screen. 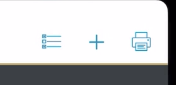
4. Select the appropriate printer from the menu and click "Print".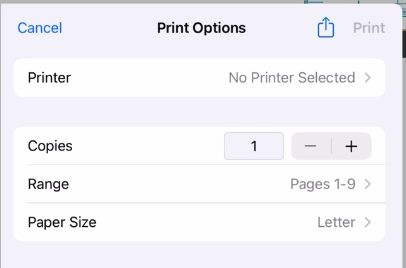
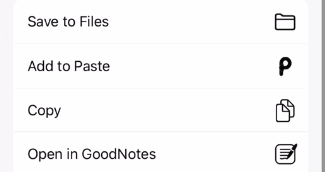
5. If you would like to save the form locally as a PDF on your computer, click the printer icon and then click the share icon. Then choose the "Save to Files" option.