Graphium’s Collector Dashboard™ allows a paper-based organization to import paper forms via Scan-to-SFTP (Secure File Transfer Protocol), which are then transcribed by the Graphium Data Entry Team.
Objective
- Grab a batch of forms from the Graphium Collector Dashboard™ for processing, and utilize data entry templates and communications for increased efficiency.
Goals
- Utilize the “Grab Batch” feature within the Collector Dashboard™ to complete 300 forms every two weeks.
- Utilize the “Template” feature within the Collector Dashboard™ to process forms more efficiently.
- Utilize the “Chat” feature within the Collector Dashboard™ to ask your data entry team questions and communicate any discrepancies found during data entry.
Directions
- Grab a Batch of Forms to Process
- Choose a Form Template for Quick Data Entry
- Utilize the Chat Feature in Collector™
Grab a Batch of Forms to Process
-
Click here to login to the Graphium Collector Dashboard.
-
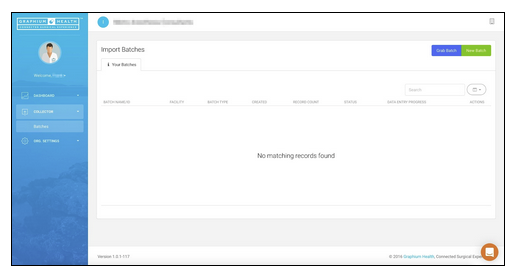
You will then see the following default screen or “Home Page.” Note: in the future, all of the batches you are working will be visible here under the “Your Batches” tab.
-
To begin data entry, click on the blue “Grab Batch” button in the top right corner:

-
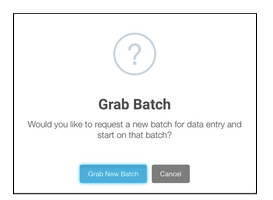
A popup will appear confirming your request to grab a new batch of forms:
-
Click the blue “Grab New Batch” button and you will see a data entry screen similar to this:

-
On the left side of the screen is a copy of the form submitted by the Graphium customer. On the right side of the screen is the data entry form you will utilize to input the data.
-
As you can see, the data entry side has 8 categories of input:
-
- Patient
- Case Information
- Provider Information
- MACRA Measures
- Additional MACRA Measures
- Quality Measures
- Outcomes
- User Area/Comments/CPT Code(s)
-
- Each data entry category has input fields which correspond to the customer form on the left. Below is an outline of where to find information on the customer form, to then input to an appropriate data entry field.
PATIENT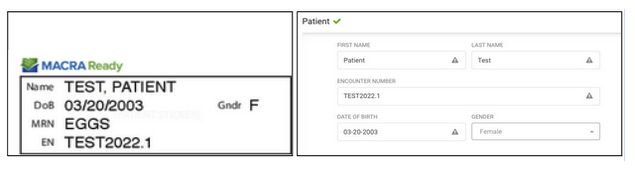
CASE INFORMATION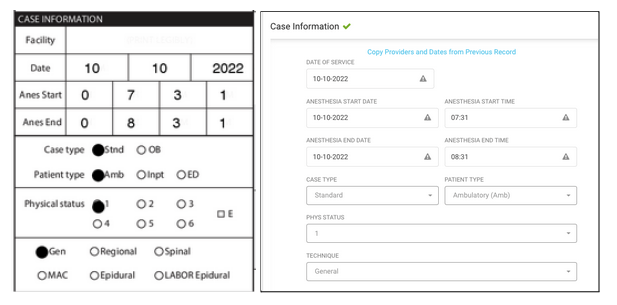
PROVIDER INFORMATION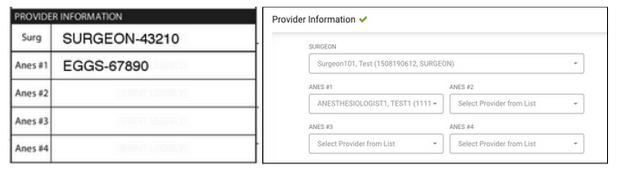
MACRA MEASURES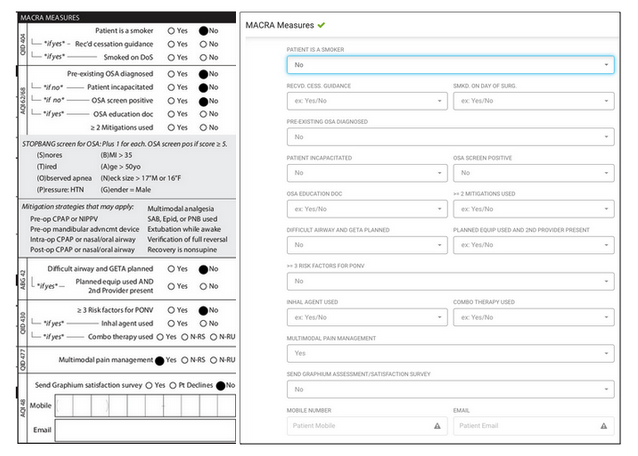
ADDITIONAL MACRA MEASURES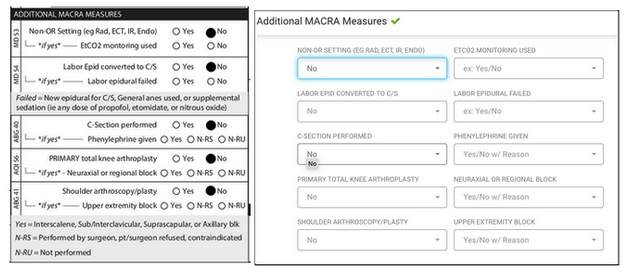
QUALITY MEASURES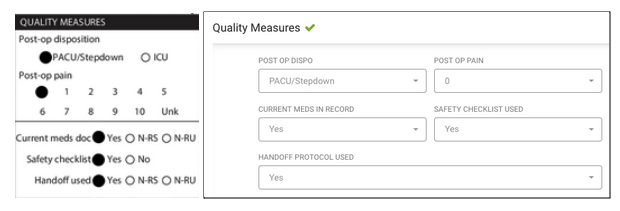
OUTCOMES
USER AREA/COMMENTS/CPT CODE(S)
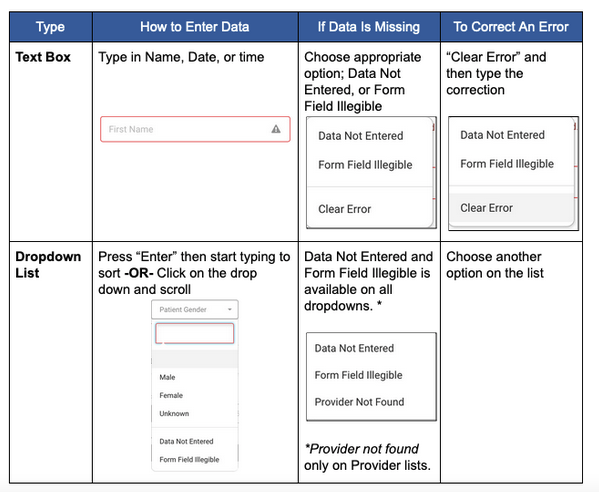
- Each data entry area will be marked with an icon next to it, which indicates its status: a Red Lightning Bolt for Missing Data, a Yellow Caution Triangle for Fields Pending Review, and a Green Check Mark for Complete.

- The goal of data entry is to fill every field and then move onto the next record. There are two methods of entering data: Typing in a Text Box and Selecting from a Drop down List.
Choose a Form Template for Quick Data Entry
-
Templates are used to reduce data entry time per form. Instead of having to go to each drop down menu, the data entry clerk needs only to focus on the Case Information, Quality Measures, and Additional MACRA Measures sections of the form.
-
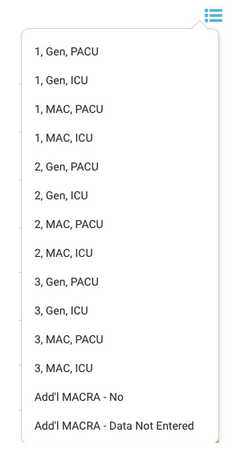
The templates ask for an answer to 4 fields from the form:
-
-
Physical Status (ASA) - Only 1, 2, and 3 are available for use with templates
-
Technique - Only Gen and MAC are available for use with templates
-
Post Op Disposition - Only PACU and ICU are available for use with templates
-
Additional MACRA Measures - Templates are only available for use if the form shows all additional MACRA Measures as “No” or unanswered - which is “Data Not Entered”. Note: the Additional MACRA Measures templates work separately and must be chosen in conjunction with a template from above.
-
-
3. Once template(s) are selected, they will automatically fill in additional data entry fields.
Therefore, you will need to do a quick double check of the following fields to ensure they are
marked the same as listed on the form:
-
- Patient Type - Ambulatory is automatically selected
- Pre Existing OSA Diagnosed - NO is automatically selected
- Patient Incapacitated - NO is automatically selected
- OSA Screen Positive - NO is automatically selected
- 3 Risk Factors for PONV - NO is automatically selected
- Multimodal Pain Management - YES is automatically selected
- Current Meds in Record - YES is automatically selected
- Safety Checklist Used - YES is automatically selected
- Hand-off Protocol Used - YES is automatically selected
- Outcomes Indicated - NONE is automatically selected
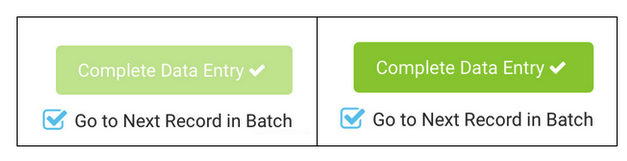
4. The goal of the data entry clerk is to activate the green “Complete Data Entry” button.
In order to do so, all required fields must have a value. Until a record is complete, the green
button will remain deactivated. Once all fields are complete, you will see the green button
highlighted and enabled for clicking.
Utilize the Chat Feature in Collector™
- In the bottom right corner of every screen within the Collector Dashboard™ you will see a pink “Chat” icon.

- For any questions or concerns while performing data entry, you can click on the icon and a pop-up will appear:

- You can type keywords into the “Search Articles” for possible quick solutions, or you can click on the pink pencil icon, which will then bring up a chat box:
