
A survey template is the foundation of every survey you send. Follow these steps to create one.
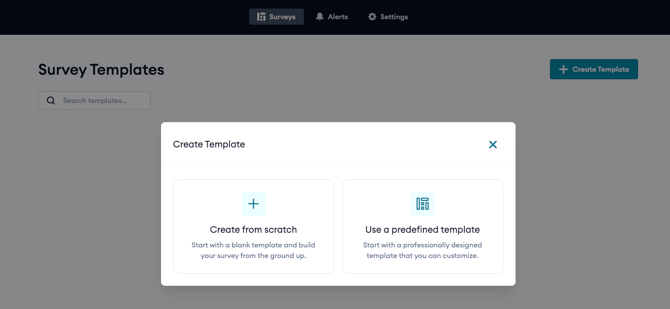
- From the top navigation, click Surveys. You will land on the Survey Templates page.
- Click the Create Template button in the top-right.
- Choose how to start: Create from scratch (an empty template) or use a predefined template (for example, the MACRA Patient Satisfaction Survey, which includes ready-made questions).
- Enter a Name, and optionally a Description.
- Save. Your new template opens in the template editor.
The Template Editor
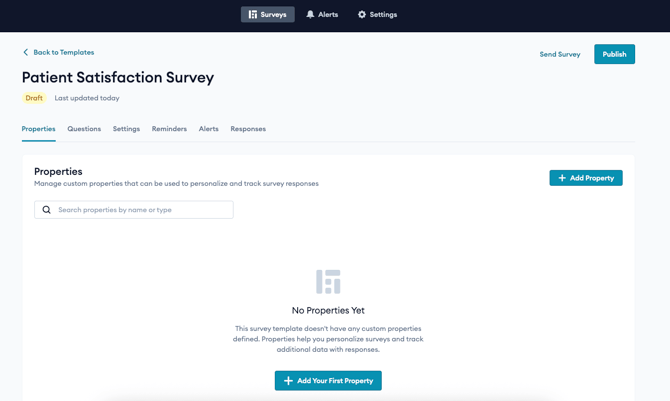
The editor is organized into tabs:
- Properties: Custom fields attached to the survey.
- Questions: The questions respondents answer.
- Settings: Opening/closing text, review link, and expiration.
- Reminders: Automated follow-up reminders.
- Alerts: Notifications triggered by responses.
- Responses: Results and scoring once the survey has been sent.
In the top-right of the editor you’ll also find Send Survey, Edit, and Publish/Unpublish controls. The Survey Templates list shows each template’s Name, Status (Draft or Published), Responses (complete, in progress, pending), and Last Updated date. Click any row to open that template.
Survey Properties
Properties are custom fields you attach to a survey. They let you personalize and track responses — for example, tagging each response with a Patient ID or department.
To add a property
- Open your survey template and select the Properties tab.
- Click Add Property.
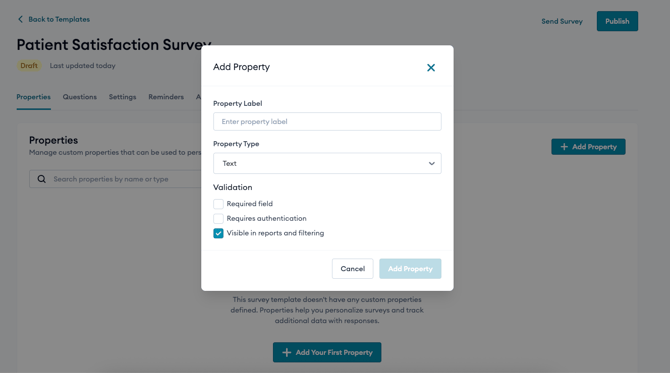
- Enter a Name for the property.
- Choose a Type: Text, Number, Date, DateTime, Boolean, or ListItem (which ties the property to a List).
- Set validation options as needed: Required, Requires authentication, and Visible in reports.
- Save.
The Properties tab displays each property’s Name, Type, whether it is Required, and whether it is Visible in Reports. You can search properties by name or type.
Adding Questions (Question Types)
Questions are what your respondents answer. Build them on the Questions tab of your survey template.
To add a question
- Open your survey template and select the Questions tab.
- Click Add Question.
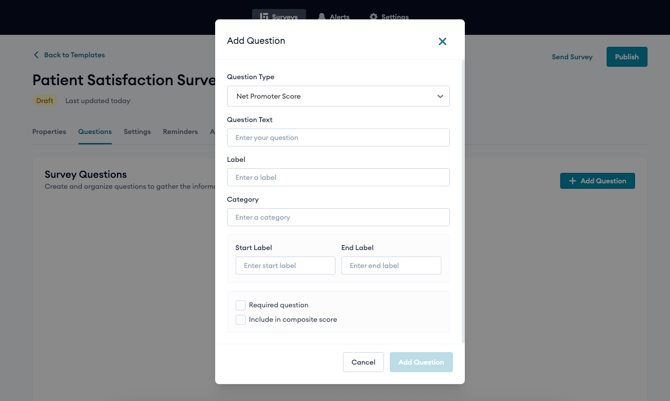
- Enter the question text (the prompt the respondent sees).
- Choose a question type (see below).
- Configure the type-specific options.
- Assign a Label — a short machine-friendly identifier (for example, nps_recommend) used in reporting, alerts, and filters.
- Save.
Question types
- Multiple Choice: Respondents pick from a set of options. Options can be entered Manually or pulled from a List (Option Source). You can enable “Allow multiple selections” and include an “Other” option.
- Net Promoter Score (NPS): A 0–10 scale measuring likelihood to recommend. You can set custom start and end labels (for example, “Not at all likely” to “Extremely likely”).
- Additional types in the selector include Text, Number, Date, Likert Scale, Star Rating Scale Dropdown List and Boolean. Configure each according to its options.
Tip: Use clear, consistent labels. Labels are how questions are referenced in Alerts and in the Responses filter.